Description

n8n NetSuite REST Custom Node
This project provides a custom n8n node for integrating with NetSuite's SuiteTalk REST API. It allows you to automate NetSuite operations (such as creating, retrieving, and updating records) directly from n8n workflows.
Features
- Connect to NetSuite using REST API credentials
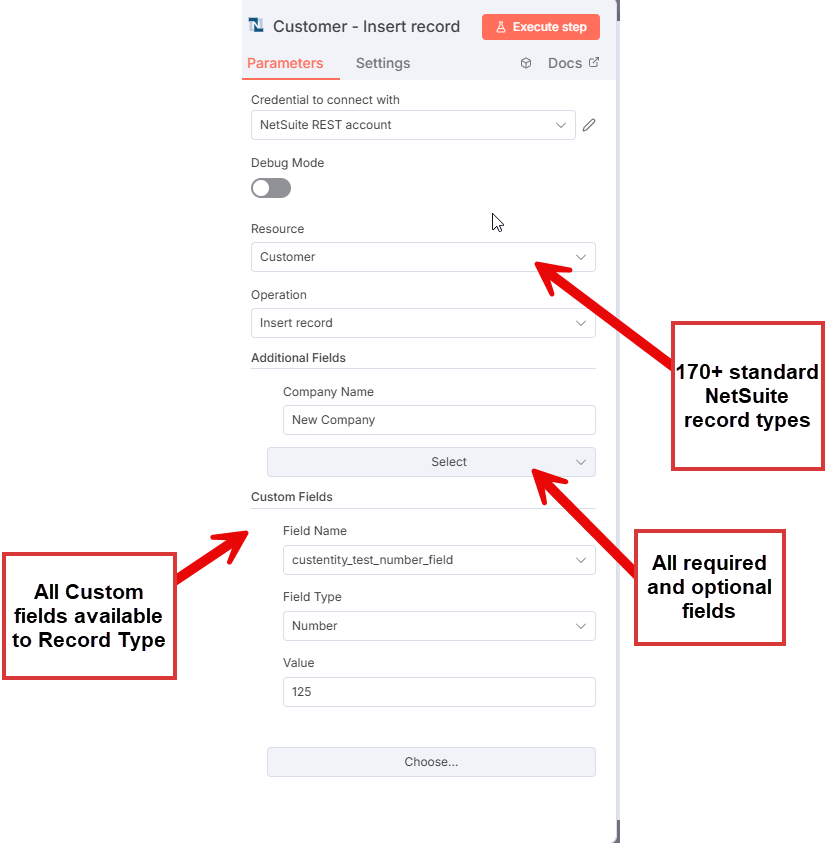
- Full support for 150+ NetSuite standard record types like Customers, InventoryItems, SalesOrders, etc…
- Handles required/optional fields and nested collections
- Automatically extracts new record IDs from NetSuite responses
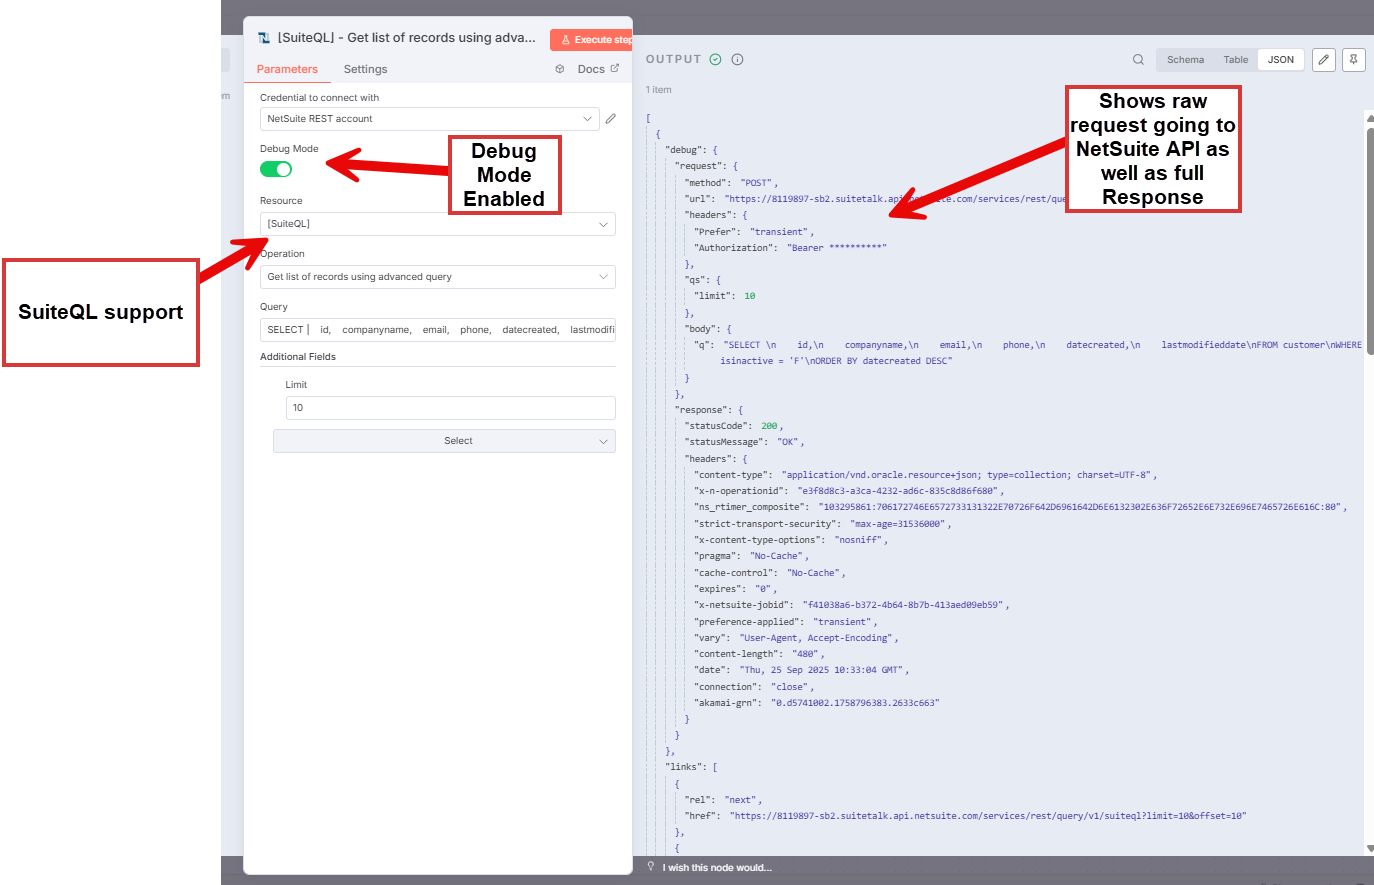
- Includes debug mode for detailed request/response output
- Custom Fields support – Work with custom entity fields (
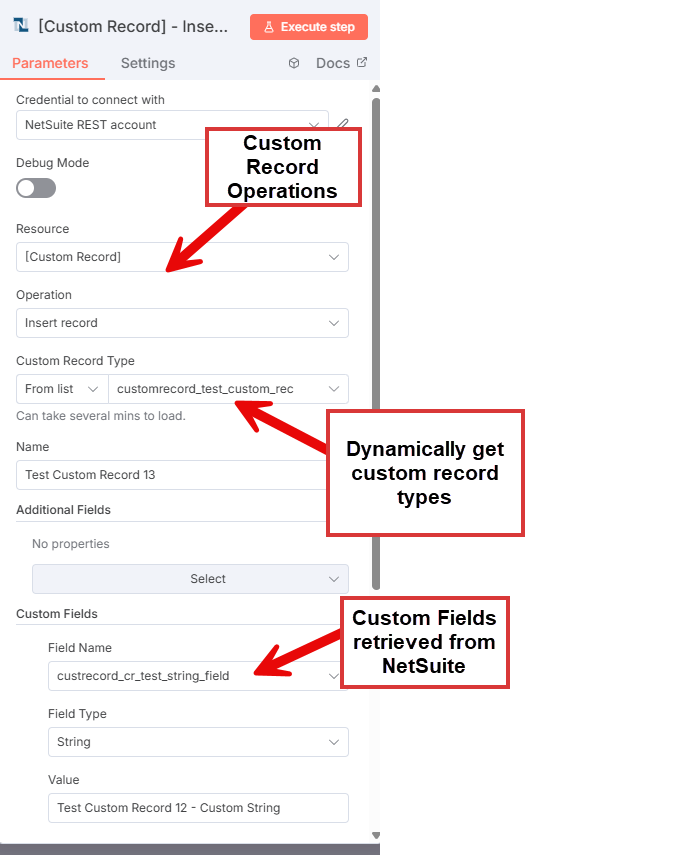
custentity_*) and body fields (custbody_*) - Custom Records integration – Create, read, update, and delete custom record types
- SuiteQL queries – Execute powerful SQL-like queries against NetSuite data with full SuiteQL syntax support
Screenshots of NetSuite REST node in Action
150+ NetSuite Standard Record types with all the fields including custom fields:
SuiteQL and Debug Mode:
Custom Records and Custom Fields:
Upcoming Features
- Custom Fields support for line fields like Sales Order line items
- Triggers
Installation
[!NOTE]
Only the n8n instance owner of a self-hosted n8n instance can install and manage community nodes from npm. The instance owner is the person who sets up and manages user management.
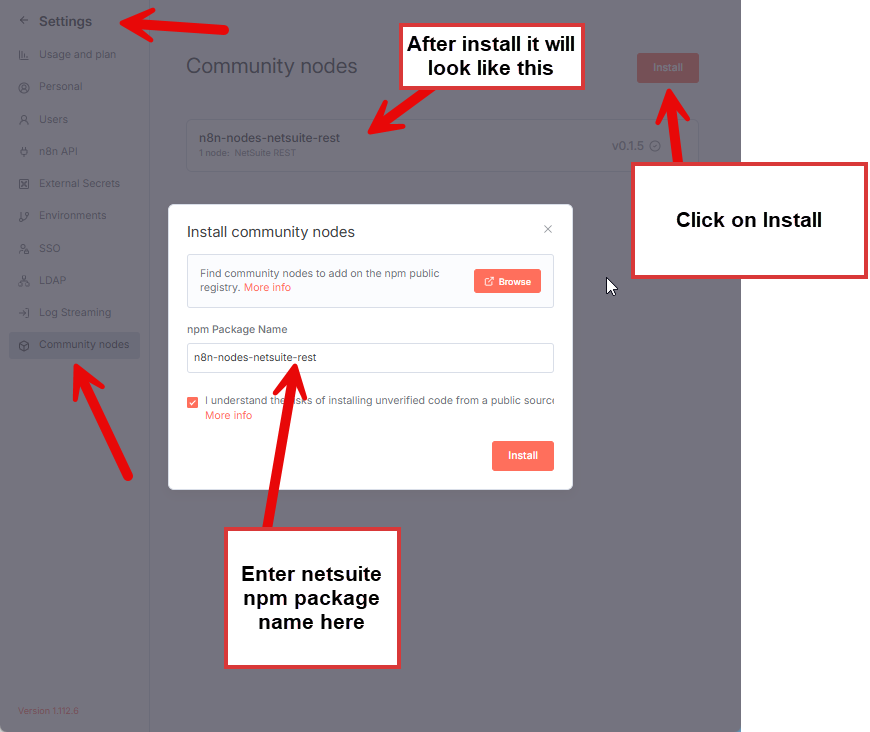
To install a community node from npm:
- Go to Settings > Community Nodes.
- Select Install.
- Enter the npm package name 'n8n-nodes-netsuite-rest'.
- Agree to the risks of using community nodes: select I understand the risks of installing unverified code from a public source.
- Select Install. n8n installs the node, and returns to the Community Nodes list in Settings.
Full n8n Installation Instructions
Usage
- Install and configure your NetSuite REST API credentials in n8n.
- Add the NetSuite REST Test node to your workflow.
- Select the resource and operation (e.g., Customer > Insert record).
- Fill in required fields and run the workflow.
- The node will return NetSuite API responses, including new record IDs for POST operations.
Example
Add a new customer:
- Set resource to
Customerand operation toInsert record. - Provide required, optional and custom fields (e.g., Email).
- On success, the response will include the new customer ID extracted from the NetSuite location header.
NetSuite Connector Config
NetSuite Integration Record
You must create an integration record in NetSuite and enable OAuth 2.0.
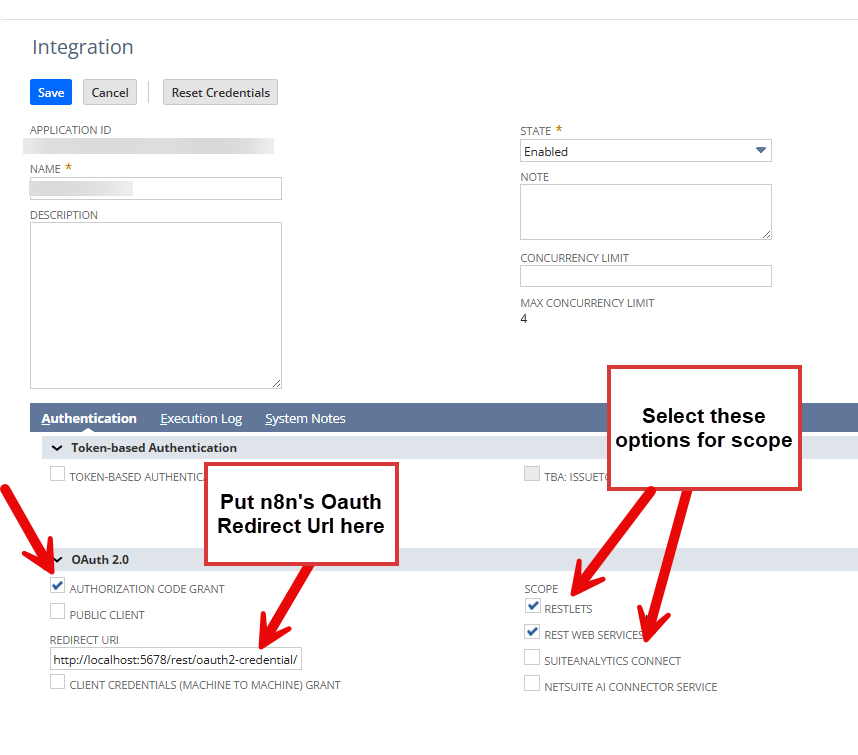
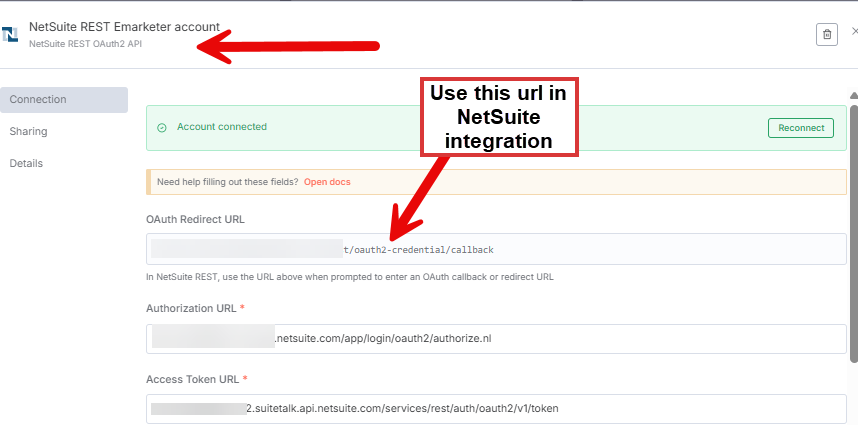
For Redirect URI use the OAuth Redirect Url from n8n Credentials. See next section.
N8n NetSuite Credential Fields Explained
Note: For NetSuite sandboxes, your account ID is usually formatted as 1234567_SB1 in the NetSuite UI, but in URLs it must be lowercase and use a dash: 1234567-sb1.
When creating your NetSuite REST API credential in n8n for OAuth 2.0, fill in the following fields:
- Client ID: Your NetSuite application (integration record) Client ID
- Client Secret: Your NetSuite application (integration record) Client Secret
- Account Subdomain: Get account subdomain from NetSuite url after login into your NetSuite account. Usually https://[account-subdomain].app.netsuite.com
Configuration Tips
- Ensure your NetSuite account has SuiteTalk REST Web Services enabled.
- Permissions for the integration user must include access to the required records and REST web services.
Known Issues and workarounds
-
Entering date into date field and submitting operation may throw error. NetSuite expects dates in ISO 8601 format (like '2025-09-25T14:00:00Z'), but n8n field with Date Selector returns format like '2025-09-25T14:00:00'
Workaround: use n8n expression to format date to conform to ISO
{{ '2025-09-25T14:00:00'+'Z' }}   --> 2025-09-25T14:00:00Z
{{ DateTime.fromISO('2025-09-25T14:00:00').toUTC().toISO() }}  --> 2025-09-25T18:00:00.000Z
{{ DateTime.fromISO('2025-09-25T14:00:00').toISO() }} --> 2025-09-25T14:00:00.000-04:00
- Search is not available when adding new step using ". This seems to be limitation for community N8n Nodes.
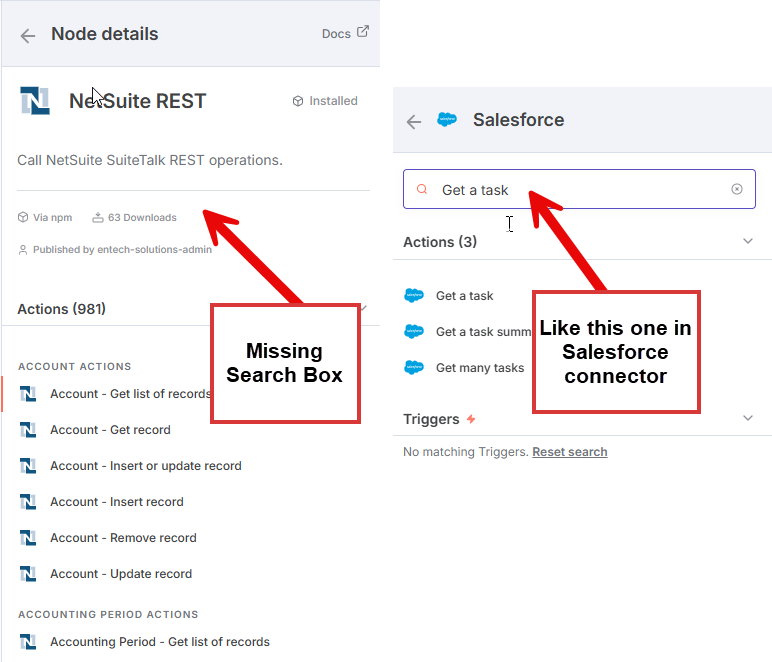
Workaround: use browser search, for example in chrome press Ctrl-F and name of operation.

-
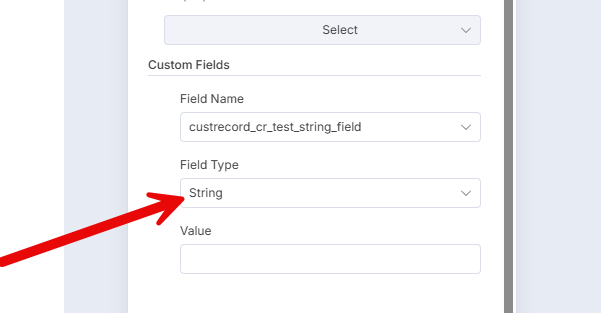
When filling Custom Fields – can't auto select field type based on NetSuite meta data. It is related to n8n bug where loadOptionsDependsOn is not working inside FixedCollection
Workaround: select field type manually
Development
If you would like to have access to code or assist with development, please contact by email: support@entechsolutions.com .